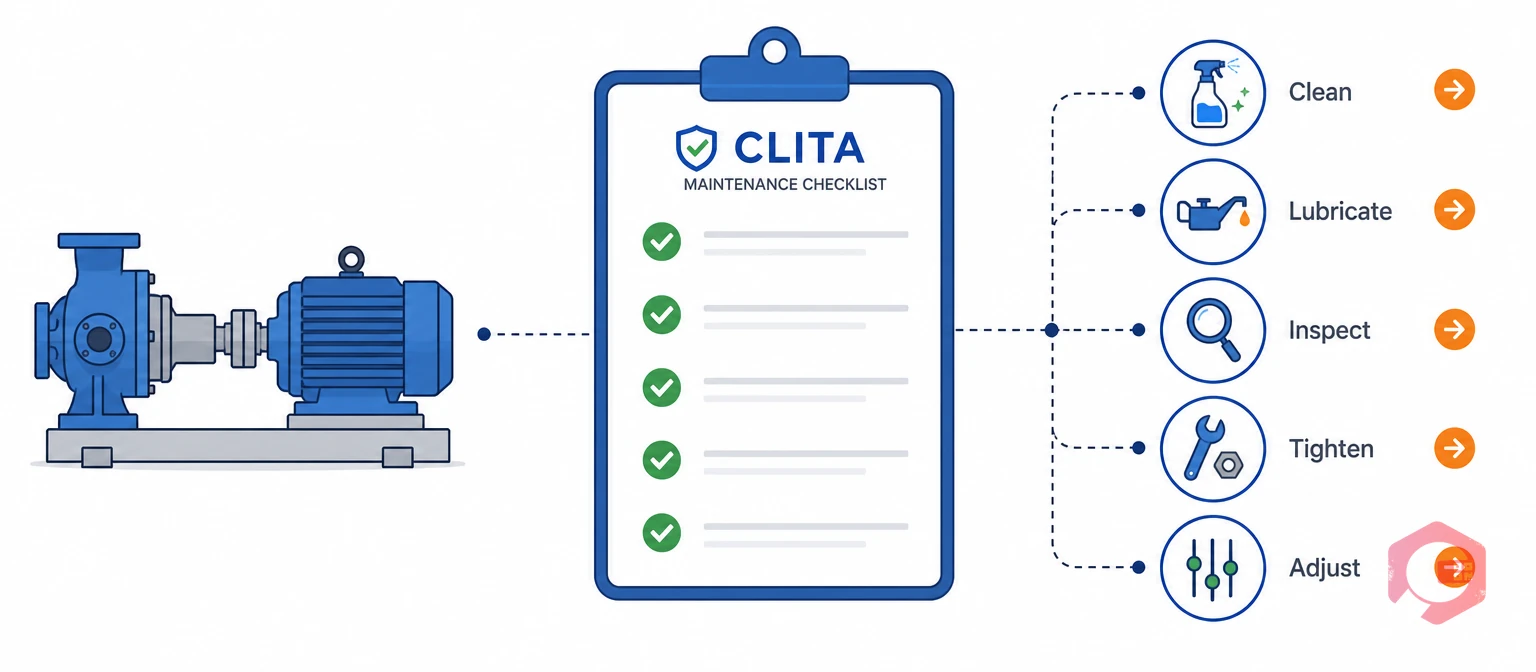
A CLITA maintenance checklist is a structured inspection document that guides technicians through five core tasks — Clean, Lubricate, Inspect, Tighten, and Adjust — on any piece of equipment. Organizations that run formal CLITA programs through a Computerized Maintenance Management Software report fewer unexpected breakdowns, longer asset life, and consistent inspection quality across every shift and technician.
Key Takeaways
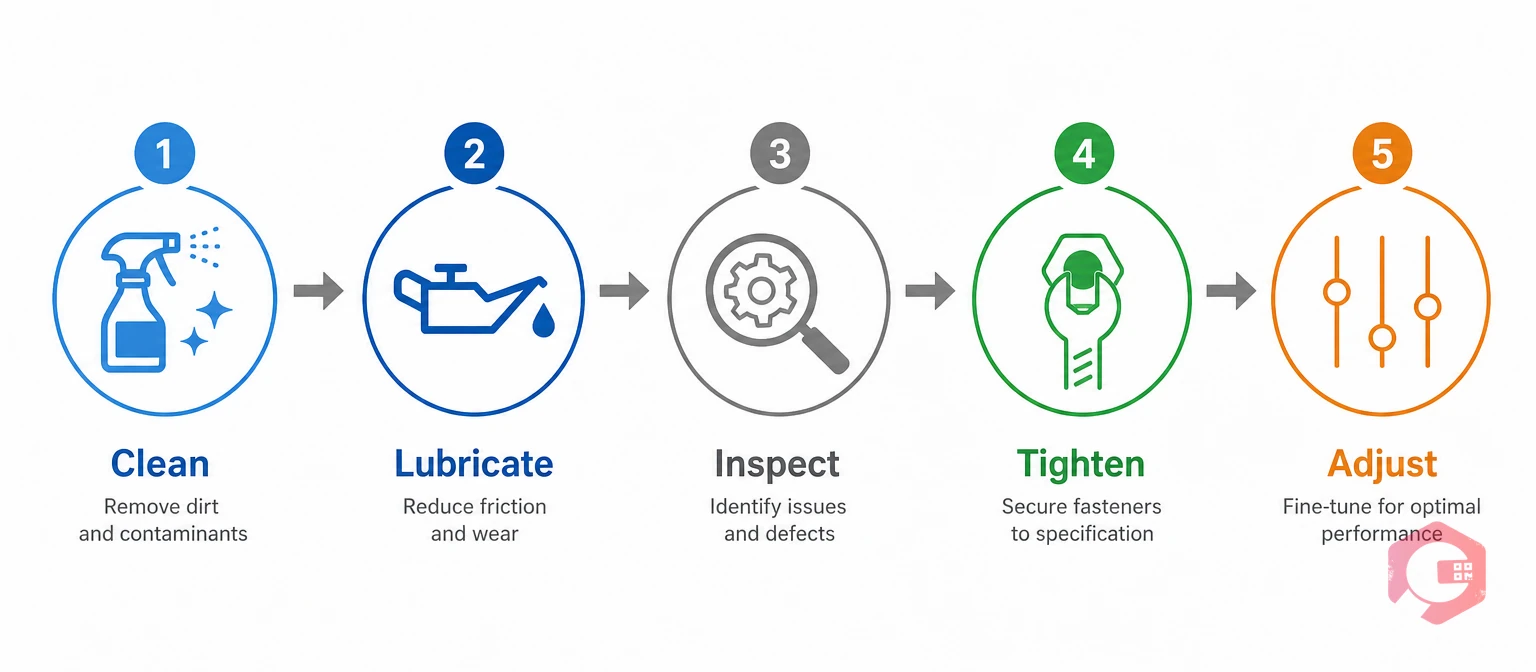
CLITA stands for Clean, Lubricate, Inspect, Tighten, and Adjust — the five pillars of thorough preventive equipment maintenance.
A CLITA checklist template standardizes inspections across technicians, shifts, and asset types so no step gets missed.
Digital CLITA checklists in a CMMS automate scheduling, generate work orders from failures, and build a complete audit trail.
Pass/fail criteria and photo capture turn a basic checklist into a powerful diagnostic tool that tracks trends over time.
What Is a CLITA Maintenance Checklist?
A CLITA maintenance checklist is a structured inspection document that guides technicians through five core tasks — Clean, Lubricate, Inspect, Tighten, and Adjust — on any piece of equipment. According to ISO 55000, a structured approach to asset management directly reduces lifecycle costs and improves reliability outcomes.
Why CLITA Inspections Matter for Equipment Reliability
CLITA inspection is a form of autonomous and preventive maintenance that keeps equipment running between major service events. Skipping any one of the five steps accelerates wear. Dust traps heat. Low lubricant causes friction. Loose bolts spread vibration. Missed electrical issues become hazards. Out-of-spec adjustments cause quality defects.
Cryotos customers report up to a 30% reduction in unplanned downtime and 25% faster repair turnaround when preventive routines are formalized and tracked digitally.
Step 1 — Build the Clean Section of Your CLITA Checklist
The first step in any CLITA inspection is cleaning. Contamination — dust, oil residue, metal shavings, moisture — accelerates component wear and masks developing faults. A well-written cleaning section makes the subsequent inspection and adjustment steps far more reliable.
What to Include in the Clean Checklist Items
Remove dust and debris from surfaces: Use compressed air or a dry cloth. Check motor housings, fan guards, and control panels.
Check for oil or fluid leaks: Wipe down the base area and look for fresh staining; record the location and severity.
Clean cooling fins and air vents: Blocked fins cause motors to overheat. Confirm airflow is unrestricted.
Remove material buildup around moving parts: Conveyors, chains, and gearboxes attract debris that increases friction.
Clean filters and strainers: Clogged filters restrict flow and put extra load on pumps and fans.
Capture a photo of the cleaned area: A photo record shows before/after condition for future trend analysis.
Step 2 — Build the Lubricate Section of Your CLITA Checklist
Lubrication is the most time-sensitive of the five CLITA steps. Under-lubricated bearings fail fast; over-lubricated gearboxes attract contamination. The lubrication section must specify which lubricant to use, how much to apply, and at what frequency.
Common Lubrication Checklist Points
Lubricate bearings to the correct specification: Record bearing ID, grease type (e.g., NLGI Grade 2), and quantity in grams.
Grease all moving joints and linkages: Conveyor joints, articulating arms, and chain links need scheduled lubrication.
Verify oil levels in gearboxes and reservoirs: Check sight glasses or dip sticks. Record the reading and top up if below minimum.
Inspect condition of existing lubricant: Look for darkening (oxidation), milky appearance (water ingress), or gritty texture (contamination).
Check lubrication intervals against manufacturer schedule: Confirm the last lubrication date is within the approved interval.
Record lubricant batch and application date: Traceability matters for warranty claims and failure investigations.
Step 3 — Build the Inspect Section of Your CLITA Checklist
The Inspect step is where most faults surface before they become failures. A thorough inspection section covers mechanical condition, electrical integrity, and performance measurements. Specific, measurable criteria catch issues weeks before they cause downtime.
Inspection Items That Catch Failures Early
Check for unusual vibration or noise: Use a baseline reference (e.g., ≤ 2.5 mm/s RMS). Mark as fail if threshold is exceeded.
Inspect belts, chains, and drive components: Check for cracking, fraying, glazing, or excessive elongation.
Verify operating temperature: Use a thermal gun. Compare against the OEM normal operating range.
Inspect electrical connections and terminals: Look for corrosion, loose connectors, burn marks, or overheating.
Check wear indicators on brake pads, liners, and seals: Record current thickness against the minimum wear limit.
Verify safety guards and interlocks are in place: Any missing guard is an automatic fail.
Step 4 — Build the Tighten Section of Your CLITA Checklist
Vibration loosens fasteners over time. The Tighten step covers mechanical fasteners, electrical terminals, and mounting hardware before the Adjust step finalizes operating parameters.
Tightening Checklist Points That Prevent Failures
Torque-check all critical fasteners to specification: Use a calibrated torque wrench. Record applied vs. OEM torque.
Check and secure all electrical terminal screws: Loose terminals cause arc flash, intermittent faults, and overheating.
Verify anchor bolts and base plate mounting: Motor foot bolts are subject to vibration loosening.
Confirm coupling and shaft alignment: Misalignment after re-assembly is a common post-maintenance failure mode.
Re-secure cable trays, conduit clamps, and gland plates: Vibration loosens cable hardware, causing chafing and shorts.
Apply thread-locking compound as specified: Where the OEM specifies thread lock, confirm it has been applied.
Step 5 — Build the Adjust Section of Your CLITA Checklist
The Adjust step is what sets CLITA apart from the original four-step approach. After tightening, technicians verify that all adjustable operational parameters — belt tension, pressure, temperature, clearance, and calibration — are set to their correct specifications. Adjustment catches settings drift that tightening alone cannot resolve.
What to Include in the Adjust Checklist Items
Check and adjust drive belt tension: Use a tension gauge. Record actual vs. target tension. Adjust the tensioner and re-verify.
Verify pressure relief valve settings: Confirm hydraulic or pneumatic relief valve settings match the OEM specification.
Calibrate temperature control settings: Verify thermostat or controller setpoints match process requirements.
Adjust clearances on wear surfaces: Check blade gaps, conveyor tracking, roller clearances. Adjust to within spec.
Verify sensor calibration and positioning: Test proximity sensors, limit switches, and level sensors. Adjust if outside tolerance.
Document all adjustments with pre/post readings: Record the pre-adjustment reading, action taken, and post-adjustment result.
The CLITA Maintenance Protocol Framework
The CLITA Maintenance Protocol is a structured five-phase approach to preventive equipment inspection that ensures every maintenance touchpoint is covered in the correct sequence, with defined pass/fail criteria and evidence requirements.
Phase 1 — Clean (Access): Remove contamination to gain full visual and physical access to all components.
Phase 2 — Lubricate (Condition): Apply correct lubricants to specified points before inspection begins.
Phase 3 — Inspect (Assess): Measure, test, and record all quantifiable parameters against defined thresholds.
Phase 4 — Tighten (Secure): Restore all fasteners and connections to specified torque values.
Phase 5 — Adjust (Verify): Confirm all operational parameters are set to specification before returning to service.
The Protocol enforces two rules: sequence lock (always run in C→L→I→T→A order) and evidence capture (every fail item must have a photo and description before the checklist can close).
How to Apply the Framework Across Asset Types
The CLITA Maintenance Protocol applies to any rotating or electrical asset. For pumps: bearing lubrication, seal inspection, shaft alignment, and pressure adjustment. For conveyors: belt tension, roller inspection, chain lubrication, and tracking adjustment. Build a separate CLITA checklist template for each asset category in your facility and link it to the asset record in your CMMS.
Best Practices for Building an Effective CLITA Checklist Template
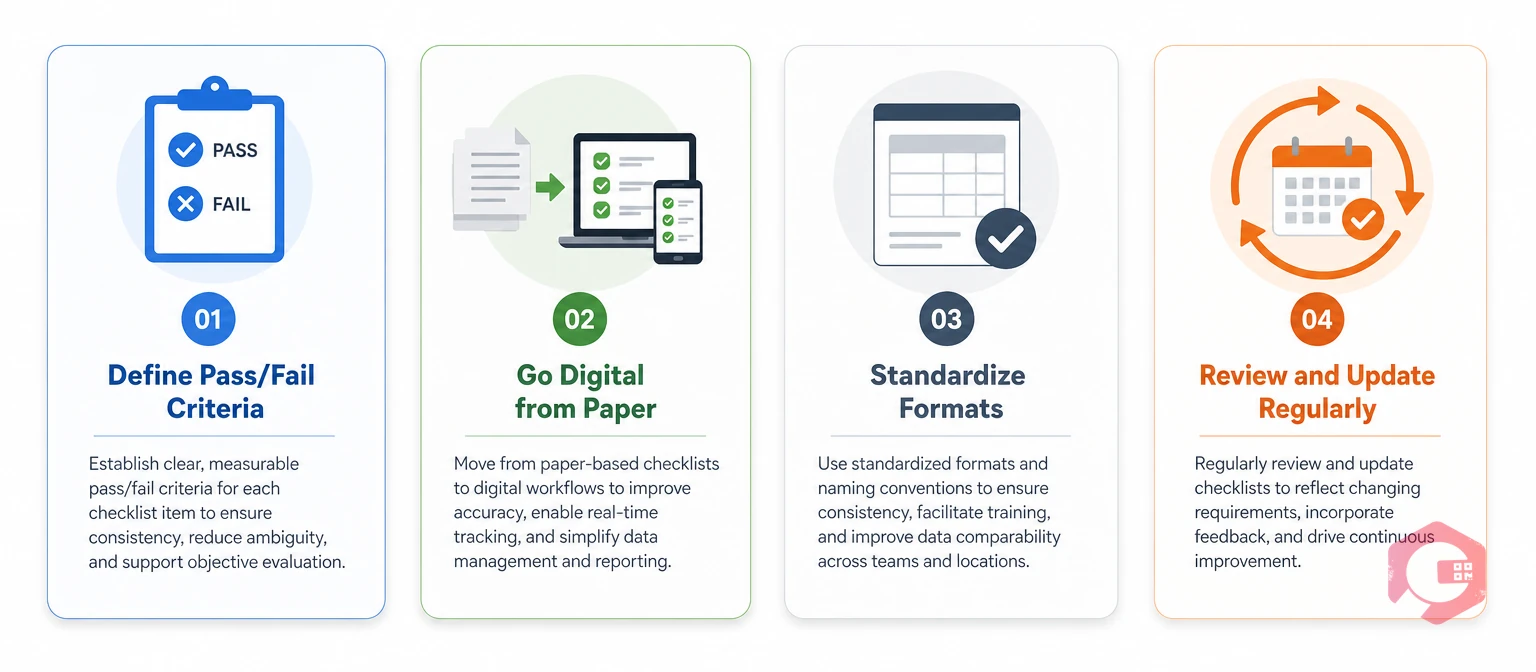
Define Pass/Fail Criteria for Every Item
A CLITA checklist item without a pass/fail criterion is just a reminder, not an inspection standard. Instead of "check bearing temperature," write "bearing temperature must be ≤ 75°C at full load." Define criteria from OEM documentation, SMRP best practices, or historical failure data — and review them annually.
Switch from Paper to Digital Checklists
Paper CLITA checklists create data dead ends. Digital maintenance checklists in a CMMS automatically route failed items to a work order workflow, store inspection history against each asset, and make completion rates visible on a real-time dashboard. OSHA's preventive maintenance guidelines require documented evidence of regular inspections — digital checklists create that record automatically.
Standardize checklist formats: All technicians use the same template for the same asset type.
Include inspection frequency on every template: Daily, weekly, monthly, or based on operating hours.
Attach SOPs and reference images: Link the OEM manual page and reference photos directly.
Enable offline mobile access: Technicians need to complete inspections without Wi-Fi in remote plant areas.
Review and update templates regularly: Update the CLITA template when a failure occurs to catch it earlier next time.
How Cryotos Helps You Manage CLITA Inspections Digitally
Cryotos addresses every CLITA execution failure point with purpose-built CMMS features designed for field maintenance teams.
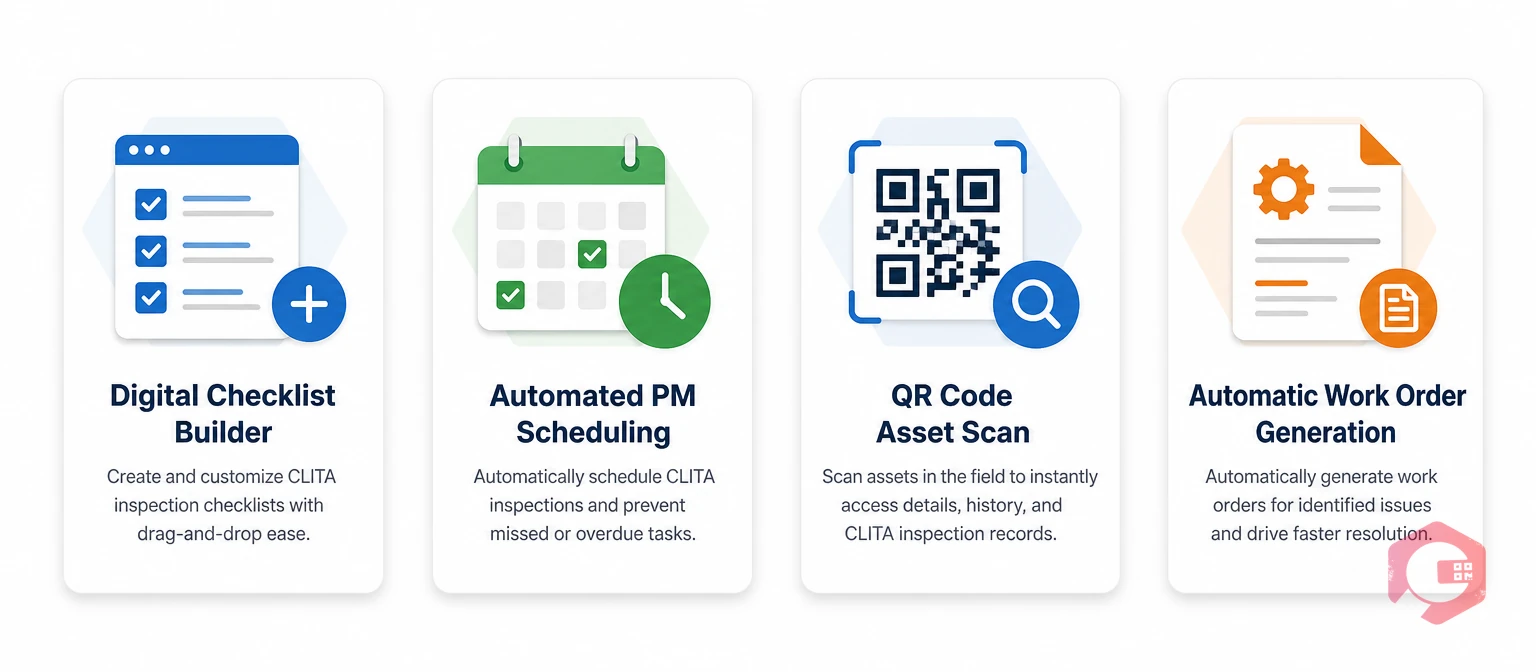
Digital checklist builder: Create customized CLITA templates for every asset type with pass/fail fields, photo capture, and signature sign-off.
Automated preventive maintenance scheduling: Assign CLITA checklists to recurring PM schedules triggered by calendar date, operating hours, or IoT meter readings.
QR code asset identification: Technicians scan the asset QR code to pull up the correct CLITA checklist instantly.
Automatic work order generation: Failed CLITA items automatically create corrective work orders with priority assignment and team notification.
Full offline mobile capability: Complete all five CLITA steps anywhere without an internet connection. Data syncs when connectivity resumes via the Cryotos mobile CMMS.
Maintenance history and audit trail: Every CLITA inspection is stored against the asset record with timestamps, photos, and outcomes.
Analytics and KPI dashboards: Track checklist completion rates, recurring fail items, and MTBF across your asset portfolio using the BI Dashboard.
Frequently Asked Questions
What does CLITA stand for in maintenance?
CLITA stands for Clean, Lubricate, Inspect, Tighten, and Adjust. It describes five sequential maintenance actions performed during a preventive maintenance inspection. The Adjust step — which verifies operational parameters are within specification — is what distinguishes CLITA from the original four-step CLIT approach.
How often should a CLITA maintenance inspection be performed?
CLITA inspection frequency depends on the asset type, operating environment, and criticality. High-duty rotating equipment in dusty or wet environments may need daily or weekly CLITA checks. Lower-criticality assets in clean environments may need monthly or quarterly inspections. Always start with OEM recommended intervals and adjust based on your failure history.
What is the difference between a CLITA checklist and a standard PM checklist?
A standard PM checklist may cover parts replacement, calibration, and functional testing. A CLITA checklist is structured around the five Clean, Lubricate, Inspect, Tighten, and Adjust steps — including an Adjust verification step that standard PM checklists often omit — making it ideal for routine walk-around inspections and operator-led maintenance.
Can I automate CLITA inspections using a CMMS?
Yes. A CMMS allows you to create digital CLITA checklists, attach them to scheduled PM work orders, assign them to specific technicians, and automatically generate corrective work orders when inspection items fail. Automation ensures CLITA inspections never get skipped and creates a complete digital record of every inspection performed.
What should a CLITA checklist template include?
A complete CLITA checklist template should include the asset name, asset ID, inspection date, technician name, sections for all five CLITA steps with specific pass/fail criteria, space for numeric readings (temperature, vibration, torque, tension), photo capture fields for failed items, a notes section, and a sign-off field.
Standardized CLITA inspections are the foundation of a reliable preventive maintenance program. If your team is ready to move from paper checklists to a fully digital CLITA workflow, Cryotos CMMS gives you everything you need — from digital checklist builder to automated work order generation and real-time dashboards. Schedule a free demo today to see how Cryotos helps maintenance teams build, schedule, and track CLITA checklists across every asset in their facility.