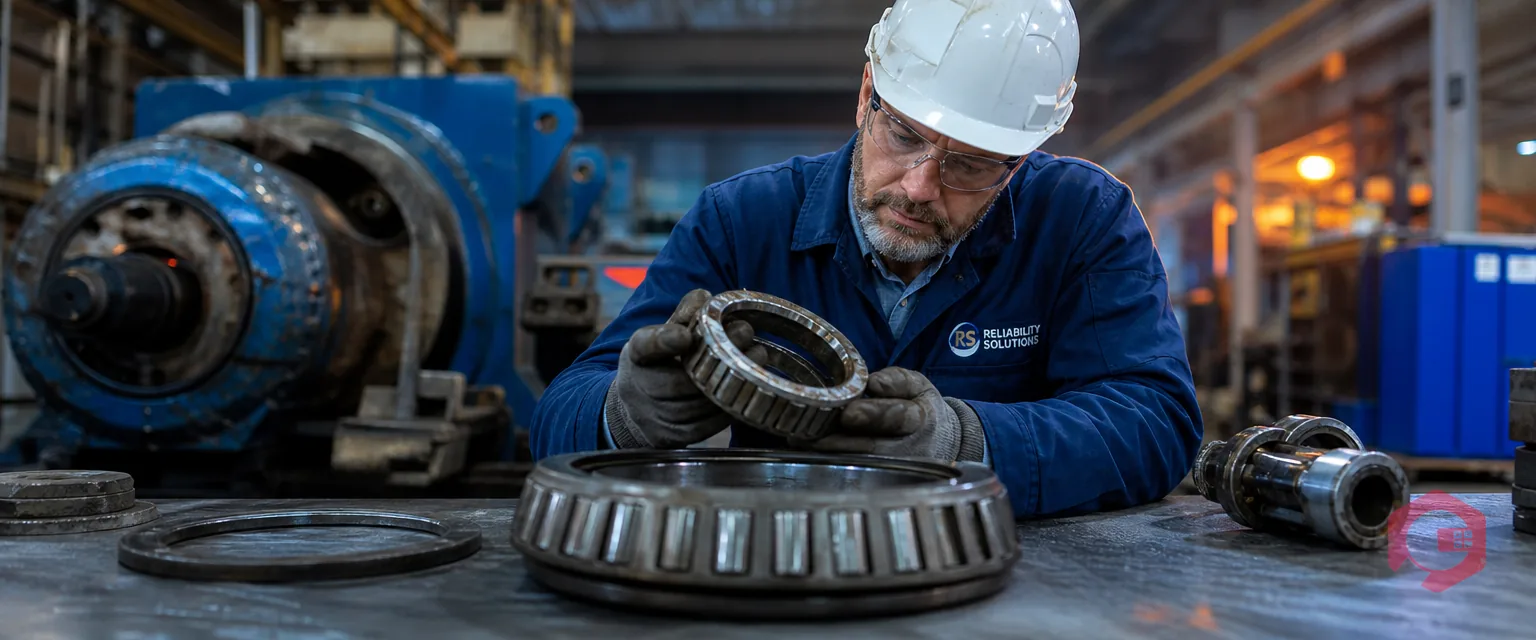
Bearing failure analysis is the process of examining a failed bearing and its operating history to find out why it failed. Done well, it turns a scrapped part into evidence that prevents the next breakdown.
Most maintenance teams replace the bearing and restart the line, which wipes out the clues. This guide gives you a four-step method, an evidence log template and the damage clues that point to a cause. It also shows how a Computerized Maintenance Management System (CMMS) keeps every finding attached to the asset.
Key Takeaways
Bearing failure analysis is the structured study of a failed bearing and its operating conditions to find out why it failed. It combines a close look at the damage with what the team knows about load, speed, lubrication and mounting.
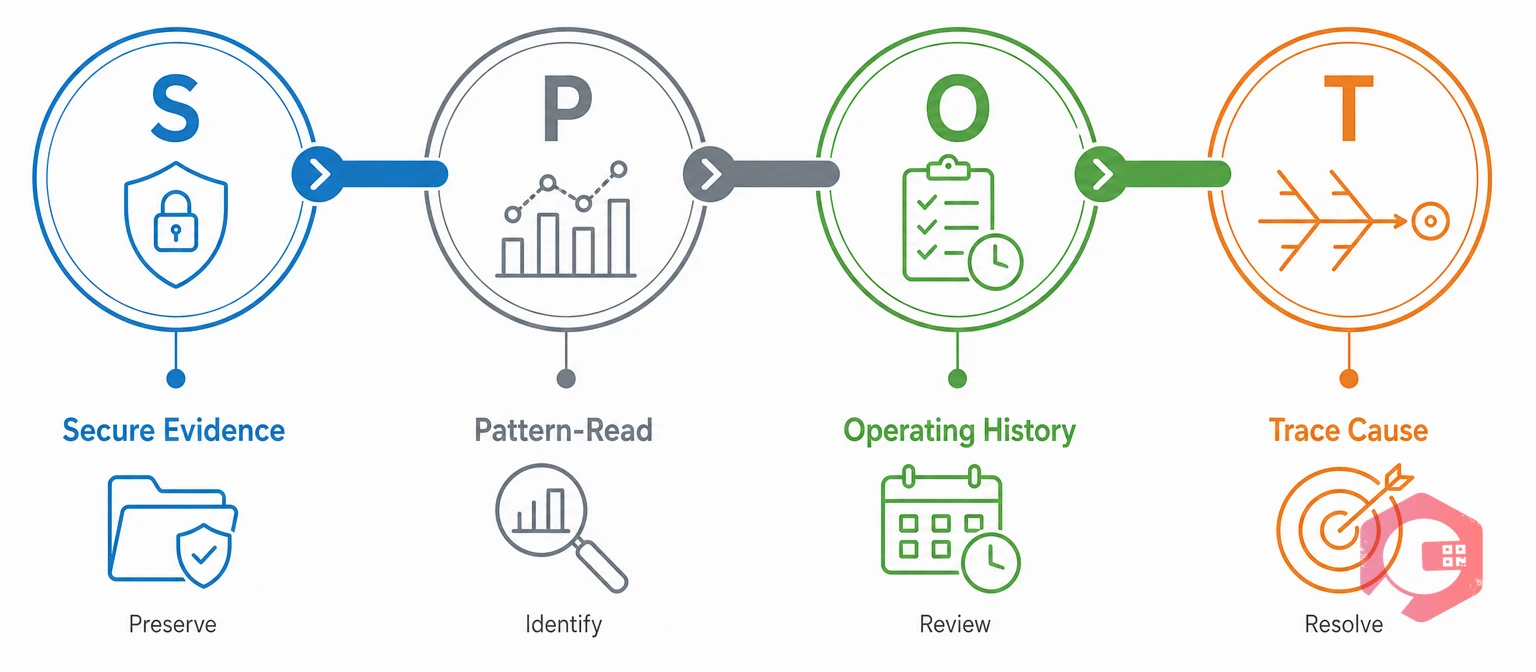
The SPOT Method:
ISO 15243 groups bearing damage into six classes: fatigue, wear, corrosion, electrical erosion, plastic deformation, and fracture and cracking. Using these terms across shifts and sites keeps findings comparable for any rolling-element bearing.
Bearing failure analysis matters because an unexplained failure is likely to repeat. A steady root cause analysis habit is one of the cheapest reliability gains a plant can make.
Secure the evidence by recording the scene before anyone cleans, strips or removes the bearing. Solvent and careless handling can erase the marks that explain the failure.
Clean evidence is worth far more than a fast restart. Good bearing failure analysis starts at the machine, and ten extra minutes there can save days of guessing later.

Pattern-reading means studying where the wear sits on the raceways and rolling elements. Position often reveals the cause faster than the damage name does. Inspect both rings and every rolling element under good light once the evidence is recorded.
Brinelling is permanent denting of a raceway caused by shock or overload. Evenly spaced dents that match the rolling element spacing are the giveaway, and false brinelling leaves similar marks when vibration acts on a stationary machine. Reading these patterns first narrows the list of likely causes before you open a single record.
Use the root cause analysis investigation checklist to record each finding on site in the same order every time.
Check the operating history by comparing what the bearing experienced with what it was selected to handle. Bearing failure analysis depends on this comparison, because identical damage can come from different histories.
| Field | What to Record | Why It Matters | Example Entry |
|---|---|---|---|
| Position and asset | Asset ID, bearing position, drive end or non-drive end | Shows whether one position keeps failing | Pump P-104, drive end |
| Running hours | Hours since installation and last bearing change | Compares real life with expected life | 3,100 hours |
| Operating conditions | Load, speed, temperature and vibration trend | Reveals overload, overspeed or overheating | 78 C, rising for three weeks |
| Lubrication | Grease or oil type, quantity, last re-lube date, contamination | Exposes under-greasing, over-greasing and dirt | Over-greased at last service |
| Mounting and fit | Fitting method, alignment check, shaft and housing fit | Poor fitting is a common hidden cause | Heated mount, no alignment check recorded |
| Damage pattern | Track position, discoloration, marks, photo reference | Links the evidence to a damage class | Off-center track, blue tint on inner ring |
A completed log turns one failure into a record the next investigator can compare against. Patterns across assets start to show.
A root cause is the earliest condition that, if fixed, stops the failure from repeating. Structured RCA methods all aim for a cause you can control, such as a lubrication practice, a mounting method or a design choice.
The 5 Whys technique suits bearing work because it stops at something you can change. For example, the bearing overheated because the grease ran low. The grease ran low because the re-lube task was missed. The task was missed because it sat in a spreadsheet nobody reviewed.
A failure analysis is finished when the fix is in the maintenance plan, not when the report is filed.
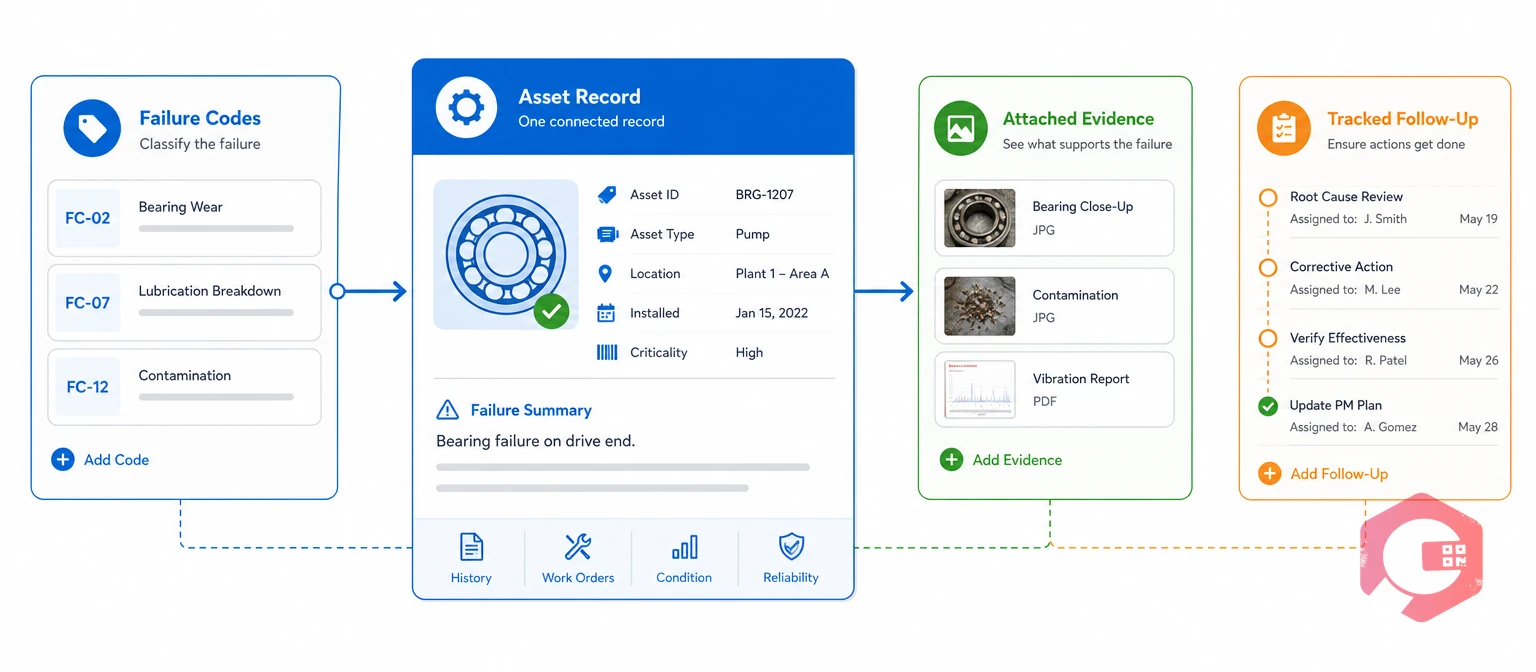
A CMMS supports bearing failure analysis by keeping the evidence, the work order and the asset history in one record. Without it, findings live in photos on phones and notes nobody can search.
Cryotos links each finding to work order management, so a repeat failure on the same position is visible at once. Maintenance teams using Cryotos have reported up to 30% reduction in unplanned downtime and 25% faster repair turnaround.
Evidence kept with the asset turns each failure into a lesson the next shift can use.
A basic review of the evidence, pattern and history usually takes one to two hours. A formal laboratory examination can take days, so most teams keep it for critical or repeat failures.
Not for most failures. A careful visual inspection, a lubricant sample and the operating history explain the cause in many cases. Send the bearing to a specialist when the failure is costly, repeated or still unexplained.
Cleaning the bearing before photographing it. Cleaning removes the discoloration, debris and grease patterns that point to the cause. Teams also tend to stop at the damage name instead of tracing the root cause.
Yes. Correct installation does not protect a bearing from contamination, lubrication problems, misalignment that develops later or stray electrical current. That is why the operating history matters as much as the mounting record.
Run one when the failure repeats on the same position, stops a critical asset, or happens well before the expected life. A single failure near the end of life usually needs only a quick log entry.
Bearing failure analysis pays off when every finding reaches the maintenance plan. Schedule a free demo to see how Cryotos keeps failure evidence, work orders and asset history in one place.



Cryotos AI predicts failures, automates work orders, and simplifies maintenance—before problems slow you down.